Summer Bucket List: Hogle Zoo

2013_6_21_1

So we learned right out of the gate that it now makes more sense for our family to buy a season pass to Hogle Zoo. Yes, we’re THAT big now.

So much has changed since our last visit. And it all looks fabulous! The train and playground were taken out while they work on a new area called African Safari. But we did get to see the brand new Rocky Shores area. And it looks like they’re getting ready to put in a splash pad! Hogle Zoo is going to be amazing when it’s all finished.

These are life-size animals made from Legos! They’re located next to the exhibits of the real animals. It was a very cool and unexpected surprise. I had no idea this was going on at the zoo this year.

2013_6_21_2

Rocky Shores was awesome! They have an area where you can go to see underneath the water. The kids loved watching the otters.

2013_6_21_3

This guy was so nice to my kids! He had a smallish group of people come in and listen to the story he told, but then my kids wanted to stay and ask questions about every.single.thing. in that little hut. LOL! It was fun though and I think they guy enjoyed having kids that were actually interested in his area. He showed my kids how to use a singing bowl and how to use chopsticks.

2013_6_21_4

Gavin’s first time on the Carousal. He rode a seal, I think? I couldn’t get him to look at me!

2013_6_21_5

Some of our favorite memories of this trip:

– Lucy walking the entire zoo without any assistance –

– the frisky peacock –

– Lego animals –

– getting rocks chucked at us by a disgruntled elephant –

– seeing a tortoise actually move fast –

Father’s Day

2013_6_17_1

We had such a nice day! Very lazy and very relaxing.

– working together out in the garden –

– dancing in the kitchen –

– water fight –

– steak, asparagus, Lion House rolls –

– Jim Gaffigan –

Happy Father’s Day, Lars! xoxo

Ryan Shupe

Going to see Ryan Shupe and the Rubberband at the Sandy Amphitheater is an annual thing for the three of us girls: my mom, my sister, and me. This year was kind of different as my mom went out-of-state to see her sister. So we were left with an extra ticket. Rachel and I decided to keep it a girls thing and invite Bethany to come along – which I’m pretty sure made her entire year. She was so excited when we told her she was going.

After dinner at Chili’s and some frozen yogurt, we arrived exactly one hour early for the concert. You’d think after years of doing this, we’d remember what time the concert starts. Nope.

So my mom’s theory is that there isn’t a bad seat in the house. Well there are bad seats. And they’re  right in front of the bass speaker. Yay us. The bass was pretty  much all we could hear the whole time. Never again, Rachel. Never. Again.

2013_6_13_1

This concert is usually so much fun with lots of energy and audience participation. But this year, it lacked some energy. Still fun, but a little bit different from past years. It seemed off somehow.

2013_6_12_2

I think they’re singing My Dandelion in this photo.

My favorite song this year: Banjo Boy.

Hybrid Tutorial: Summer Bucket List

This is a tutorial I wrote up for Deena Rutter’s blog, but I thought I would share it here too. It’s been so much fun for our family every year!

So this is our Summer Bucket List. It’s a list of all the stuff our family wants to do before school starts again in the fall. It was a just a single sheet of paper the first year we did it, but it’s since evolved into a photo diary of sorts that now hangs on our wall all summer long. The only thing we’ve really done on this board so far is the water balloons. I printed off a couple of photos from last year so that you’d be able to better understand how this will look once it’s all filled in.

SummerBucketList-web

Supplies:

–       Digital scrapbooking kits – I used mostly Pura Vida, but pulled in bits and pieces from some of Deena’s other kits: D-Cuts: Basic Shapes; Count on Me; Sail On; Scenic Route.

–       White cardstock

–       Photo-editing program – like PS or PSE

–       1 large corkboard

–       Spray paint (optional)

–       Small clothespins

–       Tacks

–       Hot glue gun and glue sticks

Instructions

1. Totally optional: I spray painted the frame of the corkboard brown to match the Pura Vida paper. I used painter’s tape to hold down some butcher paper on the actual corkboard part before I sprayed the frame. It protected the cork from getting sprayed.

2. After the paint dried, I printed off some of the blue-striped paper and cut it into 1/2” strips. I adhered the strips all the way around the frame.

2013_6_3_1

3. Next, I used hot glue to attach a tack to each of my clothespins.

2013_6_3_2

4. In PSE, I designed a small tag for each of our bucket list items. I printed these, cut them out, and then chalked around the edges.

2013_6_3_3

5. I used a very small amount of hot glue to attach each tag to a clothespin.

2013_6_3_4

6. I arranged the clothespins on the corkboard, leaving enough room between them for our 3×3 photos.

2013_6_3_5

7. Now all that’s left is to hang it up! We add a photo for each bucket list item as a way to visually cross it off.

2013_6_3_6

Now go make some fun summer memories!

Tutorial: Clipping Masks

This week, I worked with a new kit from Scotty Girl Design called Shipshape. It released in the shop today and it’s on sale!

shipshape_preview

The bold, bright colors and fun patterns were so much fun to work with. And I love yellow! I think this may have been the quickest turn around for me. I can’t remember a layout coming together this quickly!

TheVeryBigDeal-web

When I first started digi scrapping, I didn’t know anything. And I didn’t know anyone who did it. I didn’t know where to go online to get help and the YouTube videos I tried to watch were way over my head – I mean, I didn’t even understand basic how-to videos for beginners. Mostly because I didn’t understand the terminology. So I got thinking about what would have really helped me back then and I knew instantly what this tutorial would be about: Clipping Masks.

TUTORIAL: CLIPPING MASKS

I’ll be working in PSE 10.

A clipping mask is the digital equivalent to cutting a piece of paper. Only it’s non destructive. Meaning that if you don’t like the shape or size, you can change it without destroying the paper or starting over. A definite perk of digital scrapbooking!

So here’s the foundation of my layout:

SS1

You can see I’ve got my background paper picked out, tape at the bottom, and some splatter. Though I typically don’t add things like splatter to my layout until the very end – just because I don’t really know what it’s going to look like underneath everything until all the paper and “stuff” is actually there.

Now I’ll select the Rectangle Tool, click down on my layout, and draw the shape/size box that I want.

SS2

SS3

Now let’s clip some paper to the new clipping mask!

I’ve chosen the dark blue sailboat paper. Bring the paper onto your layout, making sure the paper is directly above the layer with the box you just drew (your mask). The paper will cover your whole layout right at first because we haven’t “cut” it yet.

SS4

Now all you do at this point is hold down the command key (or control on a PC) and press G. That will clip the paper to the mask. You can see there’s now a little arrow pointing down to the layer it’s clipped to. In PSE 10, you can also unclip a layer by pressing command G. I had PSE 6 before getting 10 and I couldn’t unclip a layer like that. I had to actually grab the clipped layer and either move it to someplace else in the layers palette or delete it altogether. Total pain.

SS5

The entire piece of paper is still there, it’s just only showing the part where you’ve put the mask. If you decide later on that you don’t like the shape – maybe you want your paper to be longer or wider or smaller or you want to move it somewhere else entirely – then you can select the mask layer and adjust it – without warping your paper at all. These types of masks are essential for me when creating a layout. In fact, clipping masks make up the bulk of this particular layout.

The next three layers of paper were done using the same process

SS6

SS7

SS8

Now add drop shadows to the mask layers and you’re done!

This is also how I cropped the photos and the triangle pieces on the left side.

Before I learned about clipping masks, I was bringing my paper onto the layout and then trying to resize the whole thing – warping it if necessary so that I could have a shape other than square. HA! I told you I didn’t know a thing! So then I figured out how to use the crop tool, but I found it frustrating when I wanted to make the paper just a teeny bit wider or something. I would have to delete the paper on my layout, go back to the original 12X12 paper, and start again. But with a clipping mask, you can adjust it so easily! You can even grab the paper once it’s been clipped and move it around in the mask until the pattern is showing exactly how you want.

Anyway, I hope this tutorial helps some of you who are just starting out! Happy scrapping!

2012-2013 School Year: Completed

It’s been such a busy year for us! The huge task of getting us all out here meant we weren’t super consistent with the school stuff while we were still in Upton. In fact, I had packed away all the school supplies early on because we thought we’d be moving a whole lot sooner. And then we decided to put them in public school so it made for a new and exciting transition. Lots of changes. But the kids thrived.

The report cards at the end of the year showed Bethany and Max above grade level on all counts. Liv was above grade level in math, but a little bit below in reading and comprehension – not a surprise. We’re going to continue to work with her over the summer, but she does learn a bit differently than the others. Plus I think she’s one of the youngest in her grade. We started her education at home without any concern about the public school cut off date for Kindergarten. So I think she was actually supposed to be finishing up Kindergarten this year, not first grade. Oh well. It’s done. And she’s doing really well so I’m not going to worry about it too much.

All three of them were sad the school year was coming to an end. I think they’ve made lots of friends and I know Bethany especially will miss the routine and the course work. She loved learning Russian and she embraced the challenge of filling in the gaps in her learning. She would bring home the math and science textbooks and study on her own. Funny girl! But I’m so proud of her.

As a surprise for the first day of summer vacation, Lucy and I conspired to start a water balloon war with them. As soon as they got on the bus for the last day of school, we started filling up water balloons and setting things up.

We set this up on the front porch:

2013_6_4_1

150 water balloons, 3 squirt guns, 3 buckets

And I put this on the front door:

2013_6_4_2

I stole this idea from someone on Pinterest.

And then we prepared for battle:

2013_6_4_3

We failed at putting our serious game faces on. But how cute do we look?! We’re totally cute. AND! I made a layout about our cuteness.

SmileLikeYouMeanIt-web

Now all we had to do was wait for the unsuspecting kids to get home. Mwhahaha! Some of us were more patient than others. Lucy totally managed to empty our squirt gun three times before the war even started. We watched from behind the fence as they got home, walked up to the door, and read the sign. Bethany understood first and started to get her stuff together. There was much squealing and shouting. So fun!

So here’s the aftermath:

2013_6_4_4

Lots of fun and hopefully something they’ll remember! And we were able to cross our very first item off our summer bucket list: Have a Water Balloon Fight.

My Favorite Sister

My sis came to visit last weekend! I can’t even tell you how happy that made me. At first, I wanted her to wait until Lars came back from North Carolina because I’m not really the “fun” one and I was worried her kids would be disappointed that he wasn’t there. But she came anyway and it turned out to be the best thing for me. I mean, I really really really needed a weekend of just fun.

And when I hang out with Rachel, I don’t need to worry about entertaining her or making sure everything in the house is picked up and perfect. You wouldn’t think that having four extra people in the house would be relaxing, but it really was!

So here’s our weekend in pictures:

FRIDAY

pizza

tour of the house and yard

hang out

2013_5_25_1

SATURDAY

sourdough pancakes

conquering the dirt hill

kickball

Just Dance

I almost die while making popcorn

Rachel posts embarrassing photo of me on Facebook

Wreck it Ralph

2013_5_25_2

2013_5_25_3

2013_5_25_4

2013_5_25_5

SUNDAY

Subway sandwiches

park

we take about 5000 awful pictures of ourselves in order to get The Perfect One

Candy Crush and then MORE Candy Crush

discovered: A Beautiful Mess app

Chicken Alfredo (Rachel’s FAVE!)

Pepsi

singing Everclear’s “Santa Monica” at the top of our lungs

2013_5_25_6

2013_5_25_7

MONDAY

watching my kids leave for school on the bus

Australian Rails (I won!)

Kaiden builds a fort out of garbage

softball game gets rained out

I don’t want Rachel to go home

But she does anyway 😦

So I leave whiney, depressing messages for her to get later.

2013_5_25_8

2013_5_25_9

2013 Projects

We have three projects on our to-do list for this year. There is so much to be done, but I didn’t want it to be too overwhelming or difficult to finish up before the end of the year.

1. Get the fence up.

We have a very large, triangle-shaped yard. Our house sits almost on one edge of the property and towards the front. So that leaves us with a perfect front yard and a huge backyard – which I love. But I really wanted to be able to let the chickens out to wander around without worrying too much about the dogs in our area.We also wanted some privacy and a place for our kids to play away from the road.

The fence was a pretty big undertaking. Lars and I would go out after dinner every night and walk the perimeter and talk about where we wanted the fence to stop and start. Once we decided, Lars ordered the supplies from Lowe’s and we made several runs over there to pick it all up.

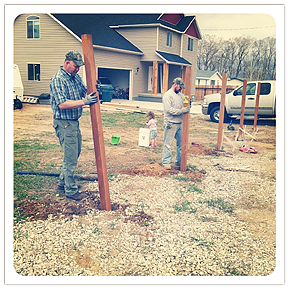
We were so fortunate to have Lars’s brother come into town for work – he stayed late and helped us dig the post holes. We completely owe him. That was hard work!

2013_5_13_1

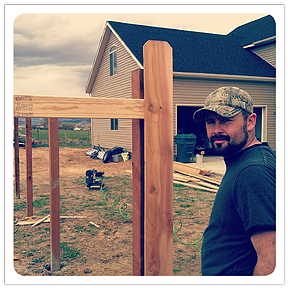
At first, we borrowed a nail gun for the slats. But we ended up buying one – making Lars one very happy camper.

2013_5_13_2

2013_5_13_3

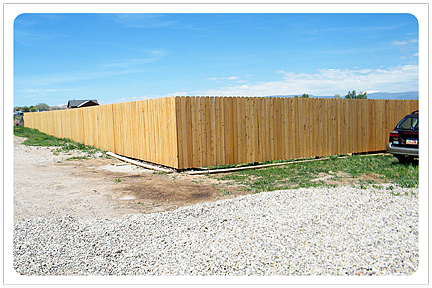
That’s a lotta fence right there.

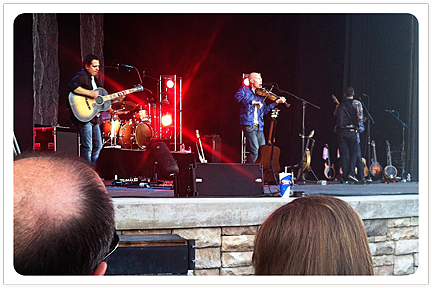
The slats went up really quickly, but we had to stop for about a week and a half because I came down with the flu. We lost an entire weekend because of it. The next weekend was the retreat for Pixels and Company plus the kids had their spring recital. We were feeling really stressed because we wanted to have the whole thing done before Lars left for a three-week training.

So over the first weekend in May, Lars was able to knock out the rest of the slats on the one side of the house…

2013_5_13_4

…and then we got a small section of fence put up on the other side – between us and the neighbors. Most of the fence was already there when we moved in, but for some reason, they stopped the fencing just short of the property line. We finished it off.

Our plans include two gates. A small one that a person can walk through and then a larger one on the other side of the house that will open up for a vehicle. Lars was able to get the small gate done no problem. But when we started planning for the large gate, we ran into some problems. The area is not level. Not even close. And though we gave it a good effort with the tiller and some of my considerable muscle (HA!), we weren’t able to do a thing. We’re going to need some heavier equipment. So for now, we’ve got a temporary chicken wire fence put up so the chickens and kids stay in the yard.

This project will have to wait until the side and front yard is leveled.

2. Get the garden put in.

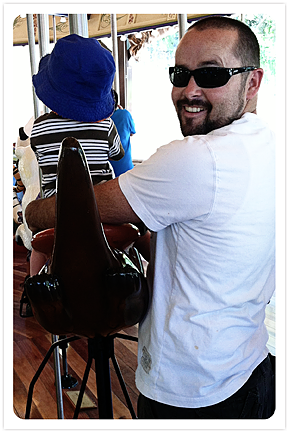
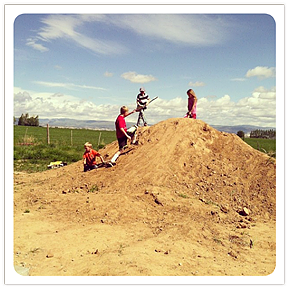
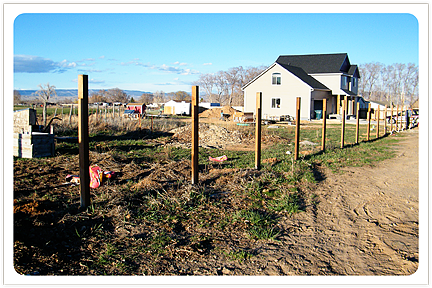
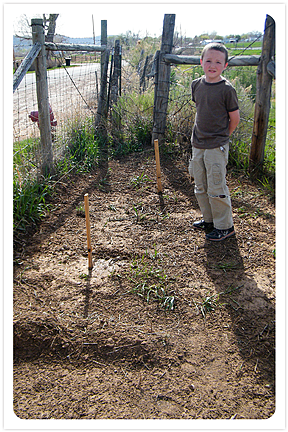
I knew right away where I wanted the garden. This was taken before the fence went up.

2013_5_13_5

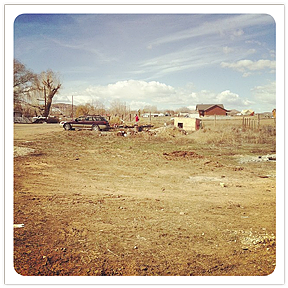
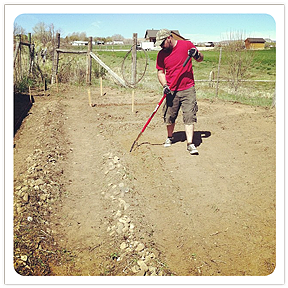
Way down there, were Lars (in the red shirt) is standing. THAT is where I wanted the garden.

This corner of the backyard is perfect! It gets sunlight all the time, it’s out of the way, and it’ll square off that part of the yard really nicely. This year, we’re keeping it small because I’m not sure how much I can handle. But I eventually want it to come clear out and be the bulk of that side of the yard.

2013_5_13_6

I want to be able to grow all the tomatoes we need for the year – about 300 lbs. Now, I’m not at all sure what that’s going to look like – in terms of how many plants and how much space it will require, but I’m sure gonna try my best!

2013_5_13_7

This year we’ve got pumpkins, beans, cucumbers, zucchini, tomatoes, watermelon, and green onion.

2013_5_13_8

our pumpkin patch

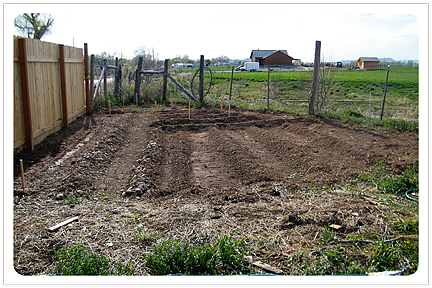
I didn’t intend to have the little pathways around the garden, but it just sort of worked out that way. I like it very much. And I found a place for my gnome!

2013_5_13_9

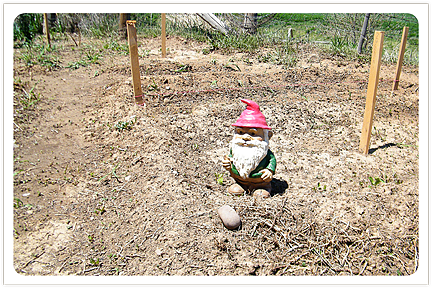
So the garden is in! I water it first thing in the morning and then Lucy, Gavin, and I go out later to feed the chickens, collect the eggs, and weed the garden. It’s our routine and it’s really lovely. I just love being outside with my littles, walking in the garden and seeing to those chores. Sounds stupid and sappy, but there it is.

3. Get the front yard landscaped.

2013_5_13_10

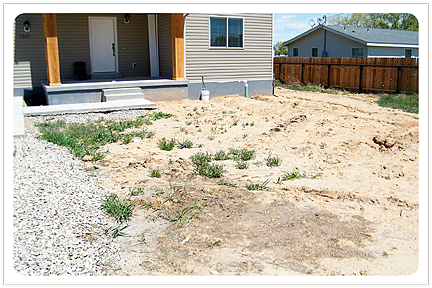
Oy. I don’t even know where to start with this one. As I spend more time out there, I kind of know that I want some green perennial shrubs (on the smallish side) to line the porch. I also want to build up the soil where the driveway meets the front walk and put in a flower bed. I think I also want something to go under the front window. Bah. I’m not really any good at this part. We need to get it figured out so we can put in a sprinkler system.

The whole right side will be gravel and we plan on parking the trailer on that side of the house behind the large gate.

On the other side of the driveway, we want to line the fence with trees and that’s all we know for sure. We don’t know if we want a little strip of grass or if we just want to put gravel there and make it additional parking. I’m leaning toward grass.

2013_5_13_11

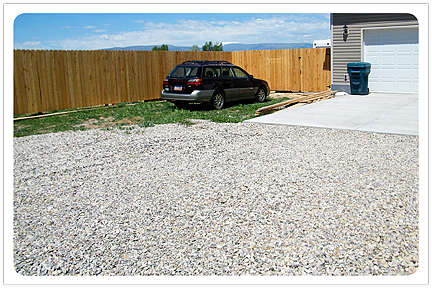
This is what we’ll be working on once Lars is home.

That’s it for our projects this year! We don’t have any major trips were taking or anything so hopefully we can complete everything by the end of summer.

Mother’s Day

Happy Mother’s Day to everyone! Lars is in North Carolina for a three-week training. Ugh. But we still had a fantastic day. I didn’t know that the schools help the kids with Mother’s Day gifts so it was such a sweet surprise when they brought me all their little presents! I tried to get a photo of all of us together, but I don’t know how to work the timer on the camera. Plus, Gavin and Lucy are not always accommodating. Photo Booth to the rescue!

2013_5_12_1

Love these crazies!

2013 iNSD CT Blog Hop!

Welcome! And happy iNSD!

So here are some of my faves from the shop –

2013_5_3_1

Claire by Karen Funk | This was one of the very first kits I ever bought and I still love it so much. The papers are all slightly textured and the kit comes with some lace pieces that I absolutely love.

Olivia-web

This Year by Scotty Girl Design |  The colors in this kit are so much fun and so very versatile.

TheFirstHaircut-web

Summer Girl by Gennifer Bursett and Celeste Knight | I love the pretty floral and butterfly papers! And the colors are so soft and gorgeous.

CountryGirl-web

Cut.It.Out. by Robyn Meierotto | This kit blew my mind when I first saw it. The masks give your papers a hand-cut look that you can’t always get in digi scrapping. It’s definitely a must-have in my stash.

UsTogether-web

The whole Pixels and Company shop is 35% off PLUS some of the designers are offering additional savings on their individual shops. The sale runs through May 5.

Want this pack of journaling cards for free?

2013_5_3_2

Collect all the letters along this blog hop and enter it into the coupon code box when you check out.

My letter is:

2013_5_3_3

Now head on over to Rachel’s blog!

And just in case you’re lost:

Pixels and Company Blog

 Sarah Hemmert 
Katherine Hansen
Mandi Buchanan
Kate Christensen <<< that’s me!
Rachel Alles
Anna Drozd
Jan Fortier
Carey Bridges
Emilie Stevenson
Ronnie Crowley
Amy Kingsford
Jennifer Hignite
Celeste Smith
Melanie Ritchie
Aria Andrus
Jennifer Evangelista
Linda Roos
Christy Carlson
Barbara Unzen
Mary Rogers
Arielle Gordon
Jeryn Carlisi
Indah Permata Sari
Melanie Call
Jen Papadimitriou
Erin Taylor
Kelly Mobley
Kim Hammond
Wendy Bretz